Adding a Website
To add a website to Joes Home Server we need to get it ready to use Github Actions as also be served via Docker.
Before we can start you need to grab it's repo URL from Github, decide on a suitable name for Docker, and also grab it's .env Private and Public variables
Customize the examples
Type your domain once and the Docker, GitHub Actions, Nginx Proxy Manager and Cloudflare examples below update as you read.
1. Create the site in your Home Server Repo
Ok if your website is called "mywebsite.co.uk" then it's Docker naming convention will be "mywebsite-co-uk" so create a folder in the "stacks/10-sites/" folder called "mywebsite-co-uk" and inside that create a file called "docker-compose.yml" with the following content:
stacks/10-sites/mywebsite-co-uk/docker-compose.yml
services: mywebsite-co-uk: image: ghcr.io/yourgituser/mywebsite-co-uk:prod container_name: mywebsite-co-uk restart: unless-stopped env_file: - stack.env networks: - edge labels: - "com.centurylinklabs.watchtower.enable=true" # Next.js may bind to localhost inside the container, making the app unreachable from other containers or the reverse proxy on the shared Docker network. environment: HOSTNAME: "0.0.0.0" PORT: "3000"networks: edge: external: true2. Also create a stack.env file in the same folder with the following content:
stacks/10-sites/mywebsite-co-uk/stack.env
# Example Private Vars - Server only e.g. in the /pages/api/ folder etcNODE_ENV=production # Just an example, optional if you wantNote: NEXT_PUBLIC_* Vars
These are a bit annoying because we need to "bake" them into our build process during the Github actions build step. So we need to add them all to 3 places.
- In
.github/workflows/prod.ymlfile (see step 3) - To the Github Repo Secrets for the website repo (see step 4)
- In the
Dockerfileas build args and ENV vars (see step 5)
3. Create the Github Actions Workflow file
Now in your Home Server Repo create a new file in ".github/workflows/" called "prod.yml" with the following content:
.github/workflows/prod.yml
name: Build + Push Docker Image (prod)on: push: branches: ["prod"] workflow_dispatch: {}permissions: contents: read packages: writejobs: build: runs-on: ubuntu-latest steps: - name: Checkout uses: actions/checkout@v4 - name: Log in to GHCR using GITHUB_TOKEN uses: docker/login-action@v3 with: registry: ghcr.io username: ${{ github.actor }} password: ${{ secrets.GITHUB_TOKEN }} - name: Set up Docker Buildx uses: docker/setup-buildx-action@v3 - name: Build and push uses: docker/build-push-action@v6 with: context: . file: ./Dockerfile push: true tags: | ghcr.io/yourgituser/mywebsite-co-uk:prod ghcr.io/yourgituser/mywebsite-co-uk:${{ github.sha }} build-args: | NEXT_PUBLIC_TEST=${{ vars.NEXT_PUBLIC_TEST }} # Add all your other NEXT_PUBLIC_* vars here tooNote: See the last line this is where all your NEXT_PUBLIC_* vars need to go.
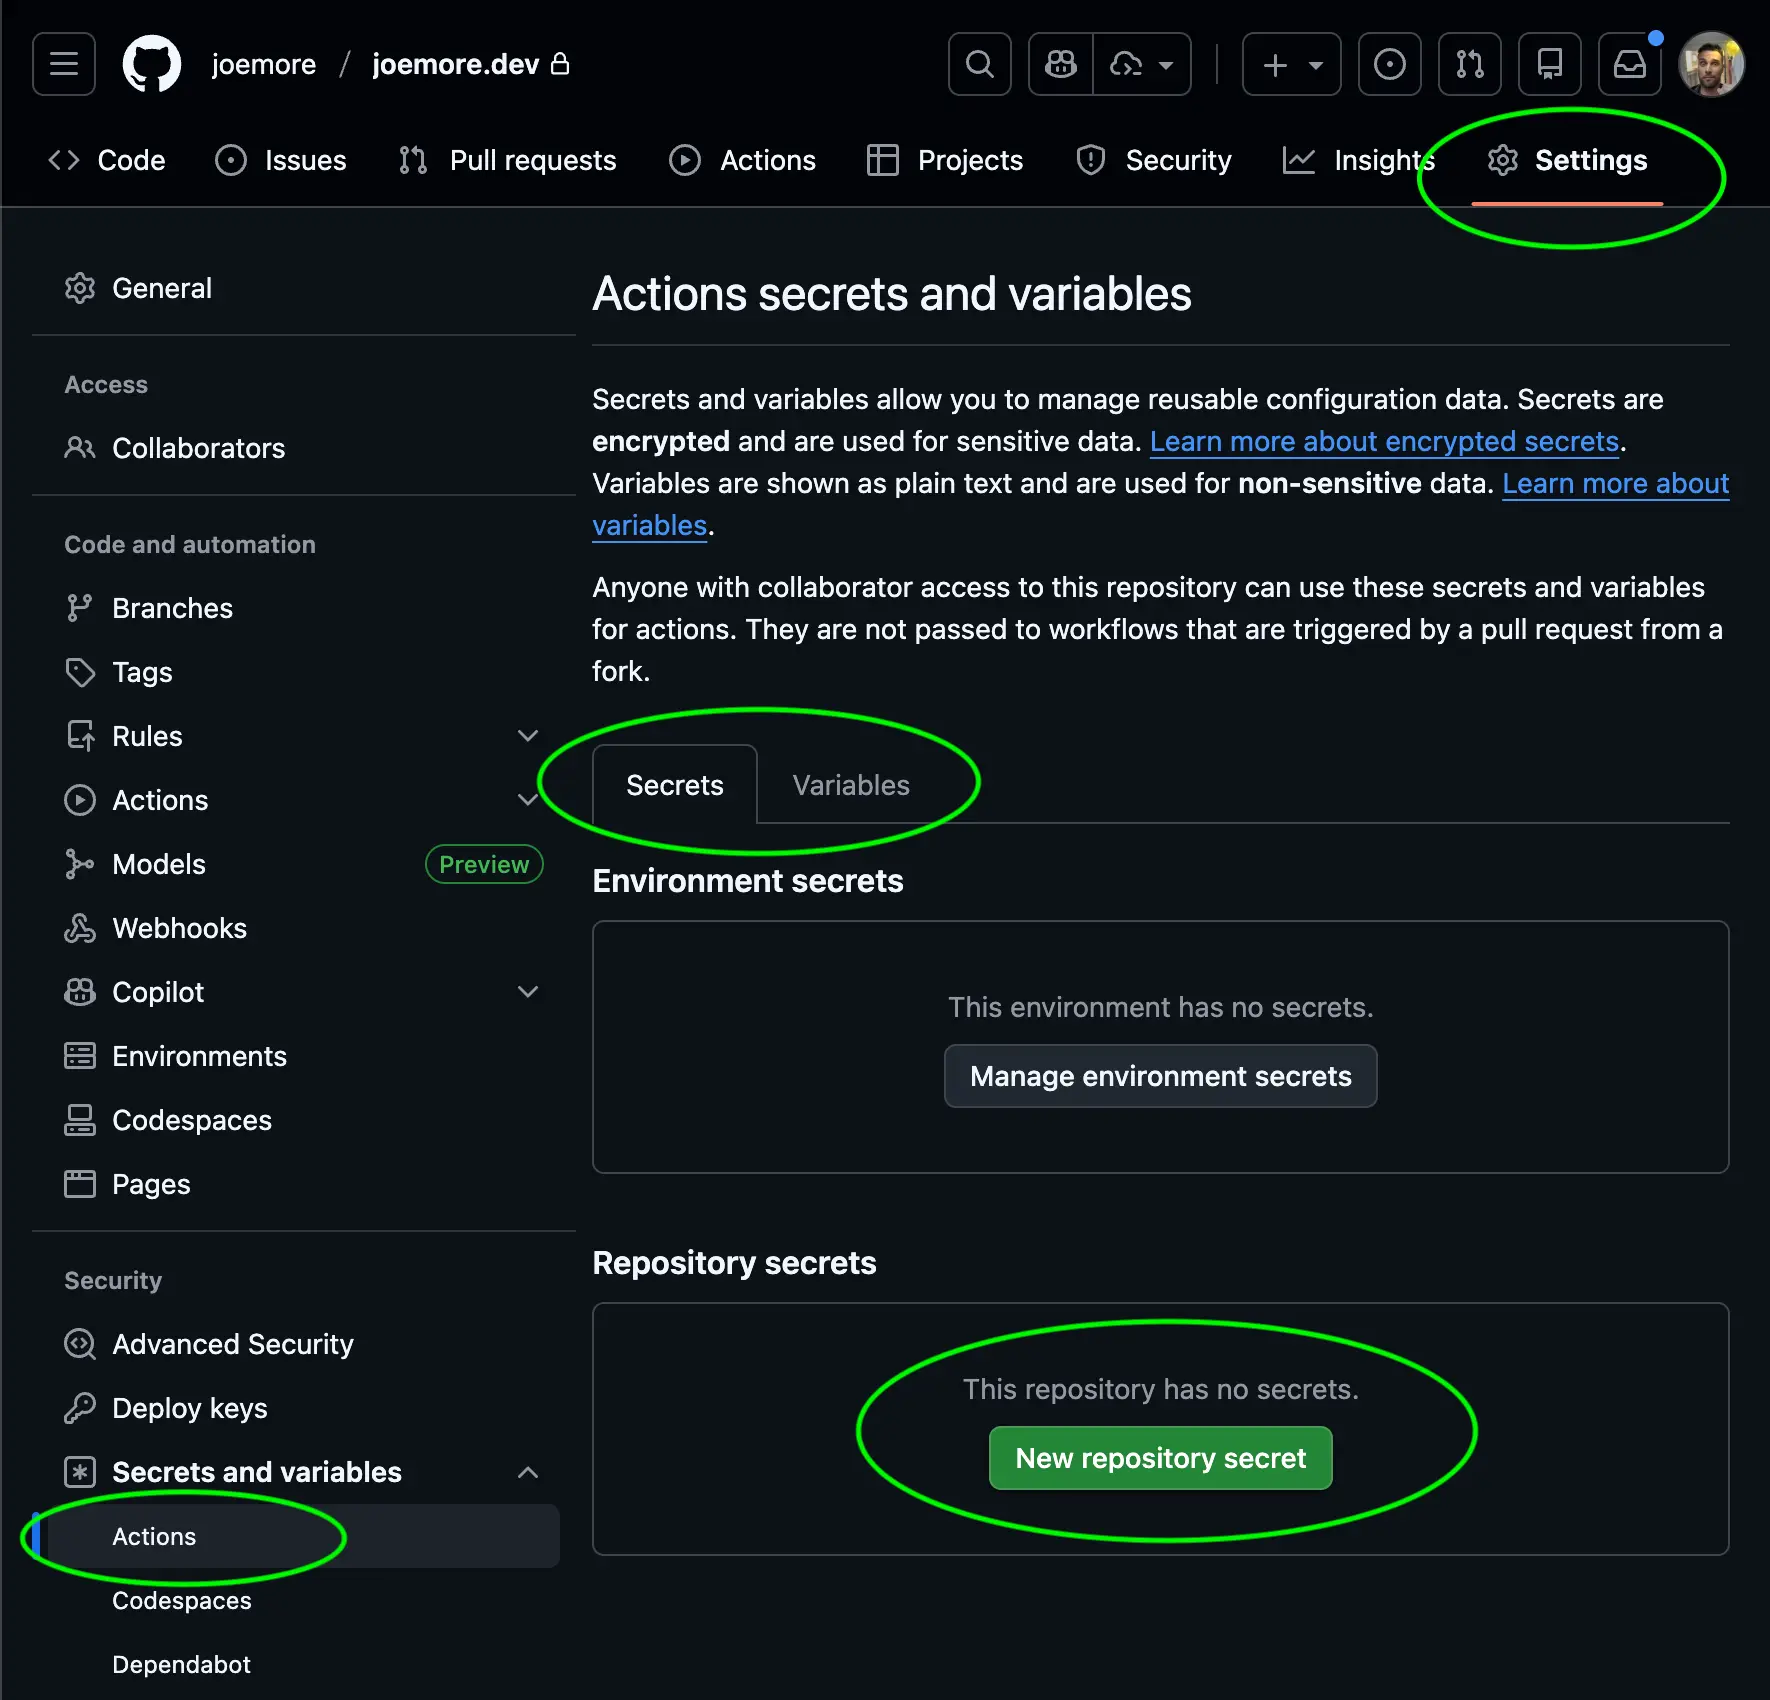
4. Add the NEXT_PUBLIC_* variables to your Website Repo Secrets or Vars
In Github, go to your Repository for your website and go to "Settings" > "Secrets and Variables" > "Actions" and add all your NEXT_PUBLIC_* variables can be added to either the Variables or the Secrets tab.
If they are NEXT_PUBLIC_* they can be in either, but generally if they are public you may as well add them to Variables, if they are private then add them to Secrets.
5. Add a Dockerfile to your Repo and add its NEXT_PUBLIC_* variables
Add this Docker file to your websites root, and update the NEXT_PUBLIC_* variables as needed.
Look for the ARG NEXT_PUBLIC_TEST and the ENV NEXT_PUBLIC_TEST=$NEXT_PUBLIC_TEST sections below
Dockerfile
# ---- deps ----
FROM node:20-alpine AS deps
WORKDIR /app

# If you use sharp (Next image optimization), this helps on alpine
RUN apk add --no-cache libc6-compat

COPY package.json package-lock.json* yarn.lock* pnpm-lock.yaml* ./

# Use Yarn 4 to match packageManager + lockfile
RUN corepack enable && corepack prepare [email protected] --activate \
    && yarn config set nodeLinker node-modules \
    && yarn install --immutable \
    || (ls /tmp && cat /tmp/xfs-*/build.log && false)

# ---- build ----
FROM node:20-alpine AS builder
WORKDIR /app
ENV NODE_ENV=production

# Decalre build args for NEXT_PUBLIC_* vars
ARG NEXT_PUBLIC_TEST

# Set ENV for NEXT_PUBLIC_* vars
ENV NEXT_PUBLIC_TEST=$NEXT_PUBLIC_TEST

COPY --from=deps /app/node_modules ./node_modules
COPY . .

# Build Next.js
RUN npm run build || yarn build || (corepack enable && pnpm build)

# ---- runner ----
FROM node:20-alpine AS runner
WORKDIR /app
ENV NODE_ENV=production

# Recommended for Next standalone output
ENV PORT=3000
EXPOSE 3000

# Create non-root user
RUN addgroup -S nextjs && adduser -S nextjs -G nextjs

# If you enable output: 'standalone', Next generates .next/standalone
# We'll try to use it; if you don't have it yet, see step 1.2.
COPY --from=builder /app/public ./public
COPY --from=builder /app/.next/static ./.next/static
COPY --from=builder /app/.next/standalone ./

USER nextjs
CMD ["node", "server.js"]
6. Set output: 'standalone' in next.config.js
In your next.config.js file add the following:
next.config.js
const nextConfig = {
  output: 'standalone',
};
This is so that when Next builds it creates a standalone version of the app that can be run in a Docker container.
7. Create a branch called "prod" and push your code
We have defined our Github Actions workflow to run when code is pushed to the "prod" branch, so create that branch and push your code to it.
This will mean that when you or any of your team push code to the "prod" branch it will automatically build and push a new Docker image to Github Container Registry, and then our Linux home server will automatically pull the new image and restart the container.
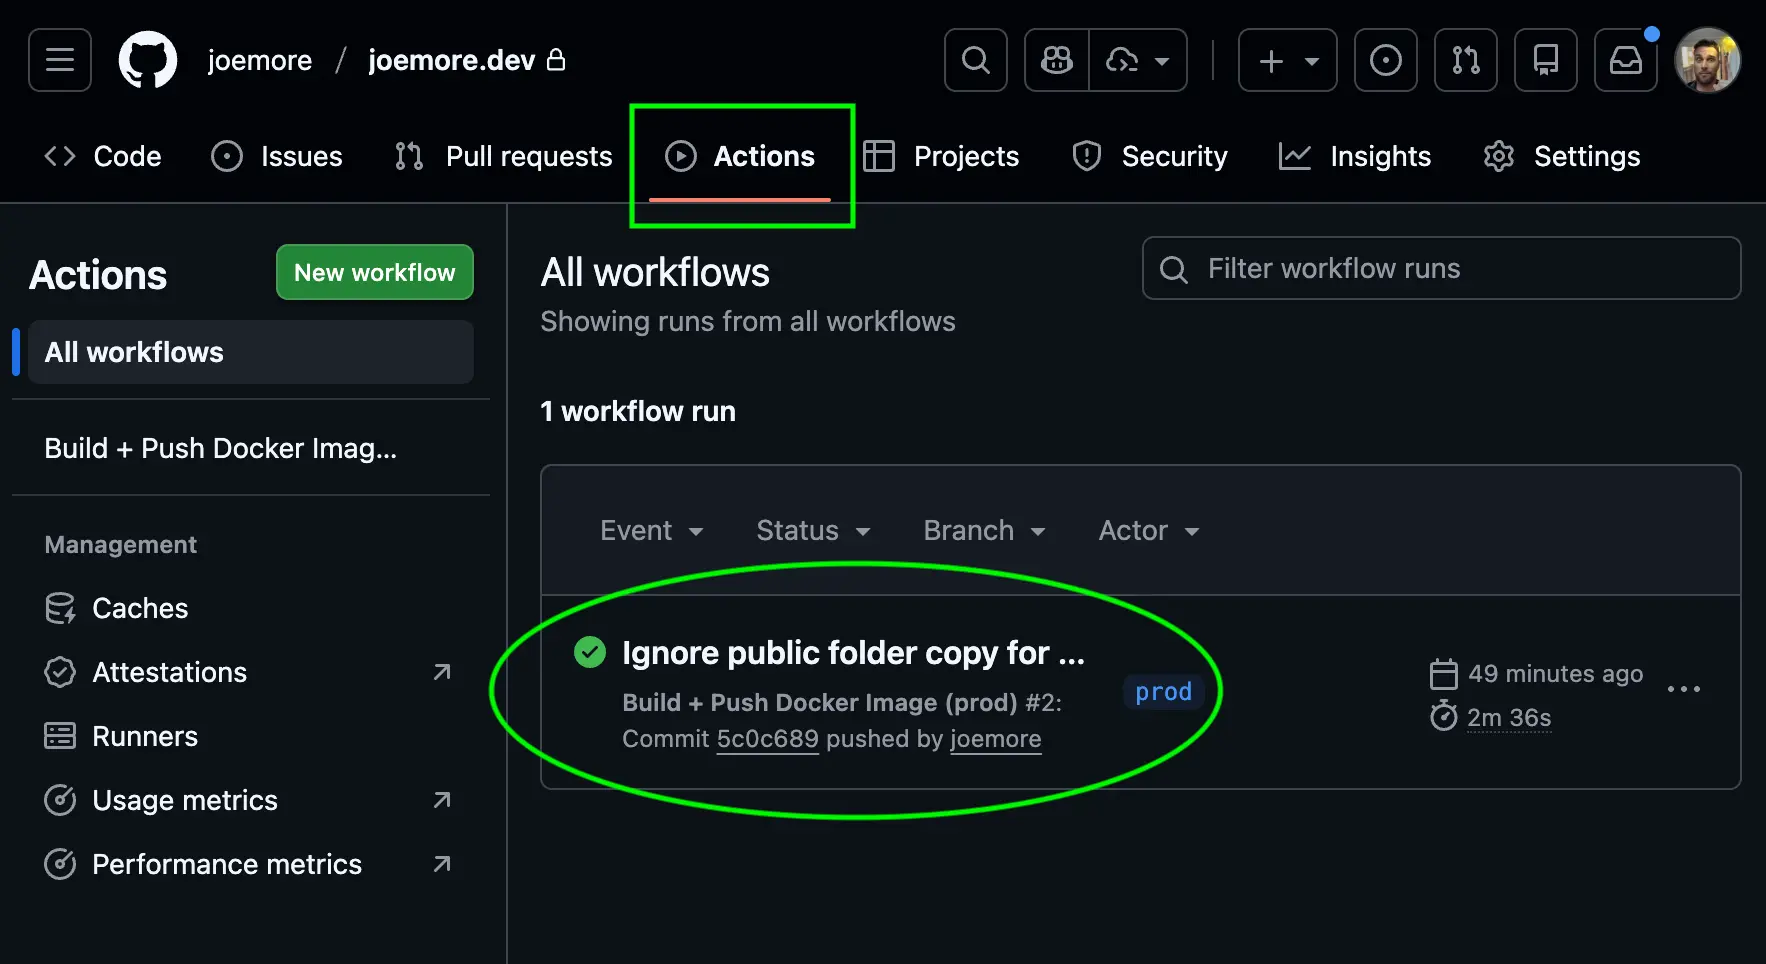
8. Once pushed to prod - open up Github Actions and make sure the build runs successfully
It might take 2 to 3 minutes to complete but you should see a new workflow run appear in the Actions tab for your repo and build successfully.
9. Deploy the Website on your Home Server
Now on your Home Server run the following commands to start the new website container:
Home server commands
cd ~/Develop/ubuntu-home-server/stacks/10-sites/mywebsite-co-ukdocker compose up -ddocker logs mywebsite-co-uk --tail 50 -fYour website should now be running on your Home Server. But next we need to set up Nginx Proxy Manager to route traffic to it through cloudflare.
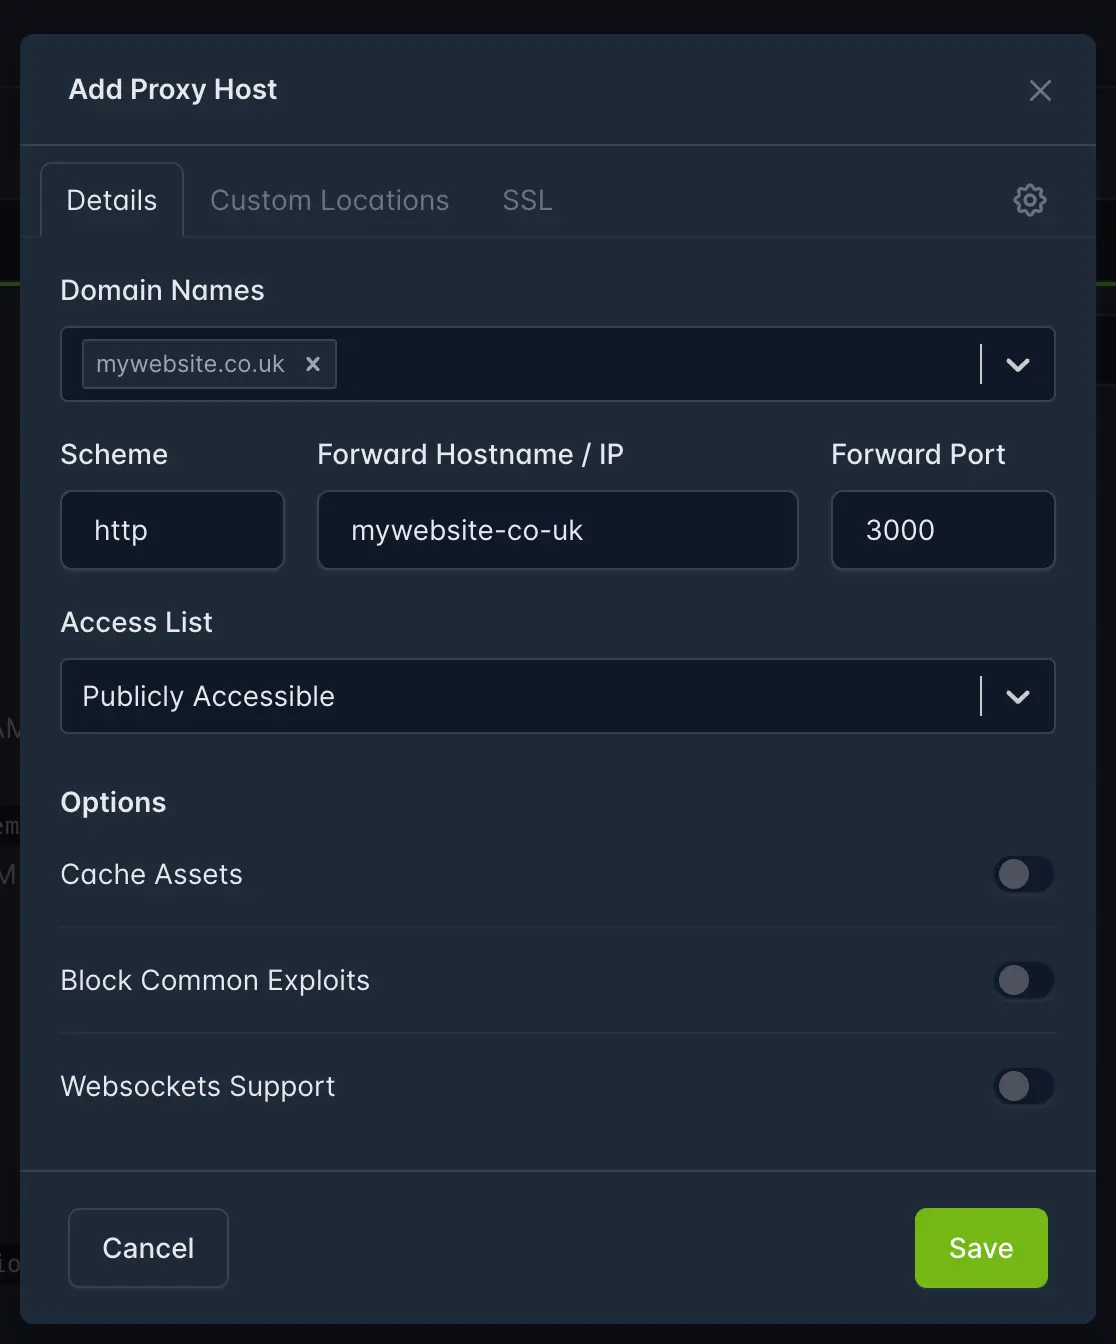
10. Nginx Proxy Manager (internal routing)
Create a new Proxy Host:
- Domain Names:
www.mywebsite.co.uk (and mywebsite.co.uk too if you want both) - Scheme: http
- Forward Hostname / IP:
mywebsite-co-uk - Forward Port: 3000
Optional internal test:
docker exec -it nginx-proxy-manager sh -lc "curl -I http://mywebsite-co-uk:3000 | head"
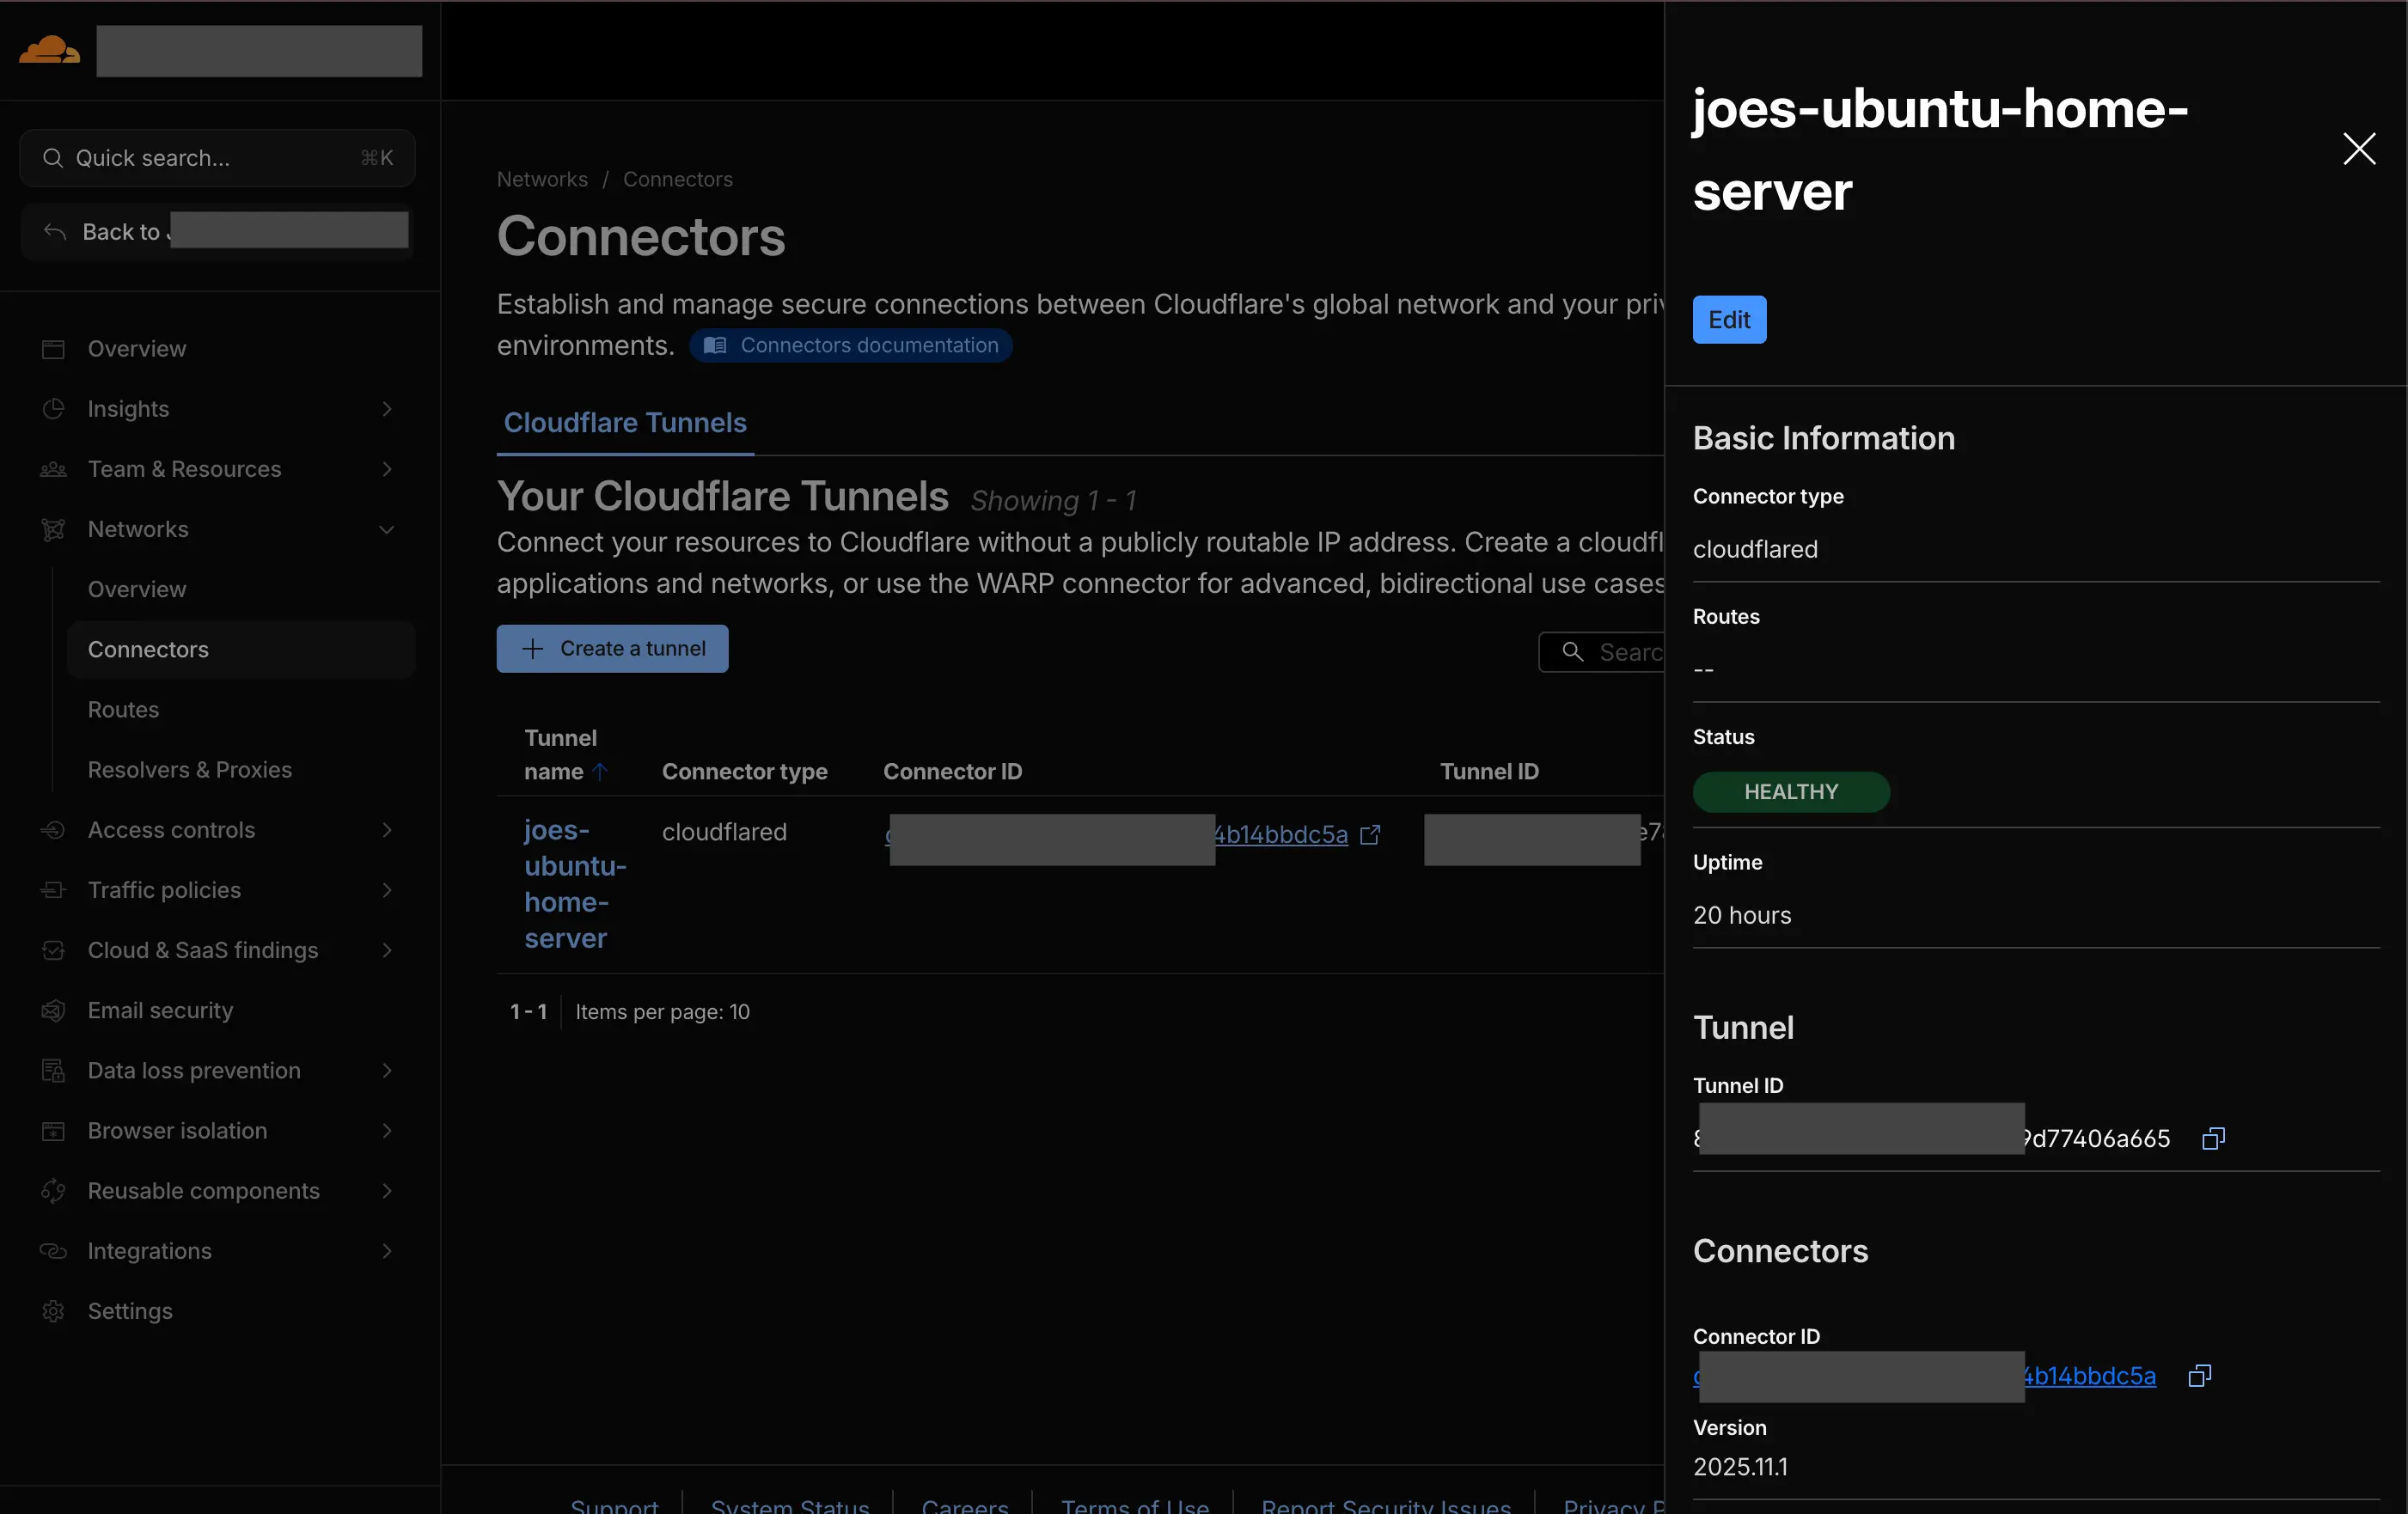
11. CloudFlare Tunnel
Add a new Ingress Rule to your CloudFlare Tunnel for the new domain pointing to your Nginx Proxy Manager instance.
CloudFlare --> Zero Trust --> Network --> Connectors --> Create Tunnel or select your existing Tunnel and click Edit
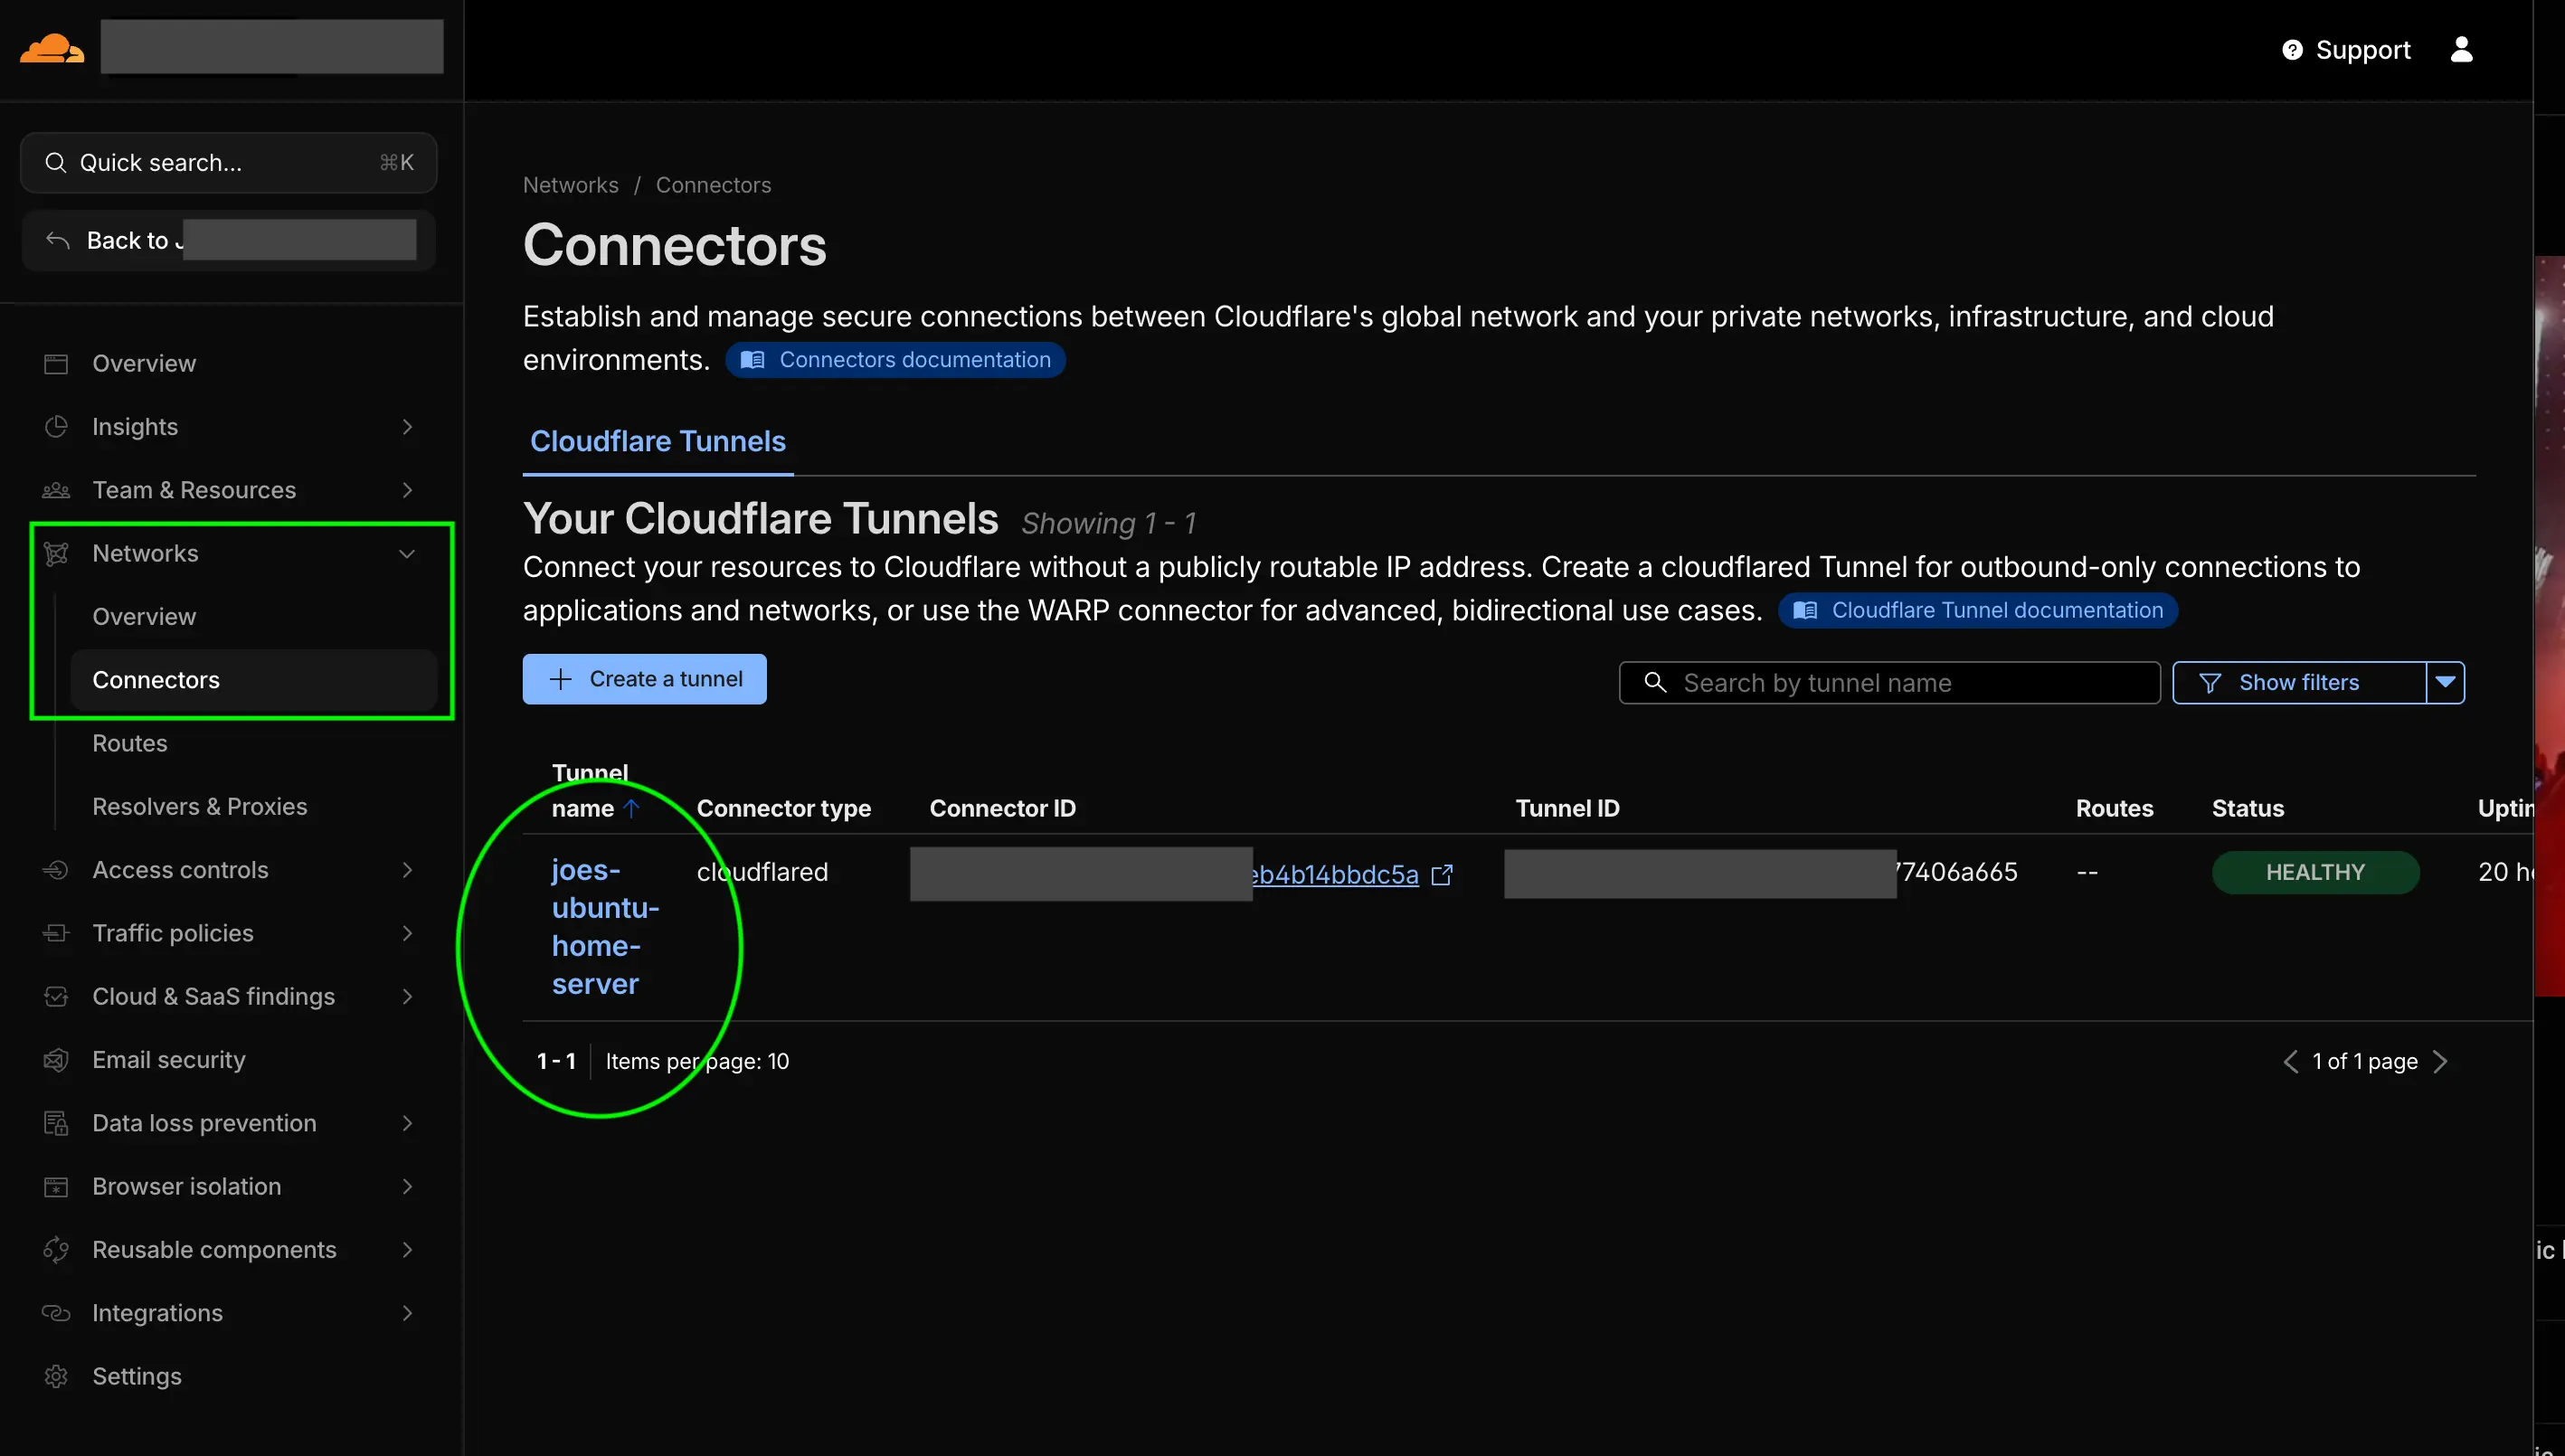
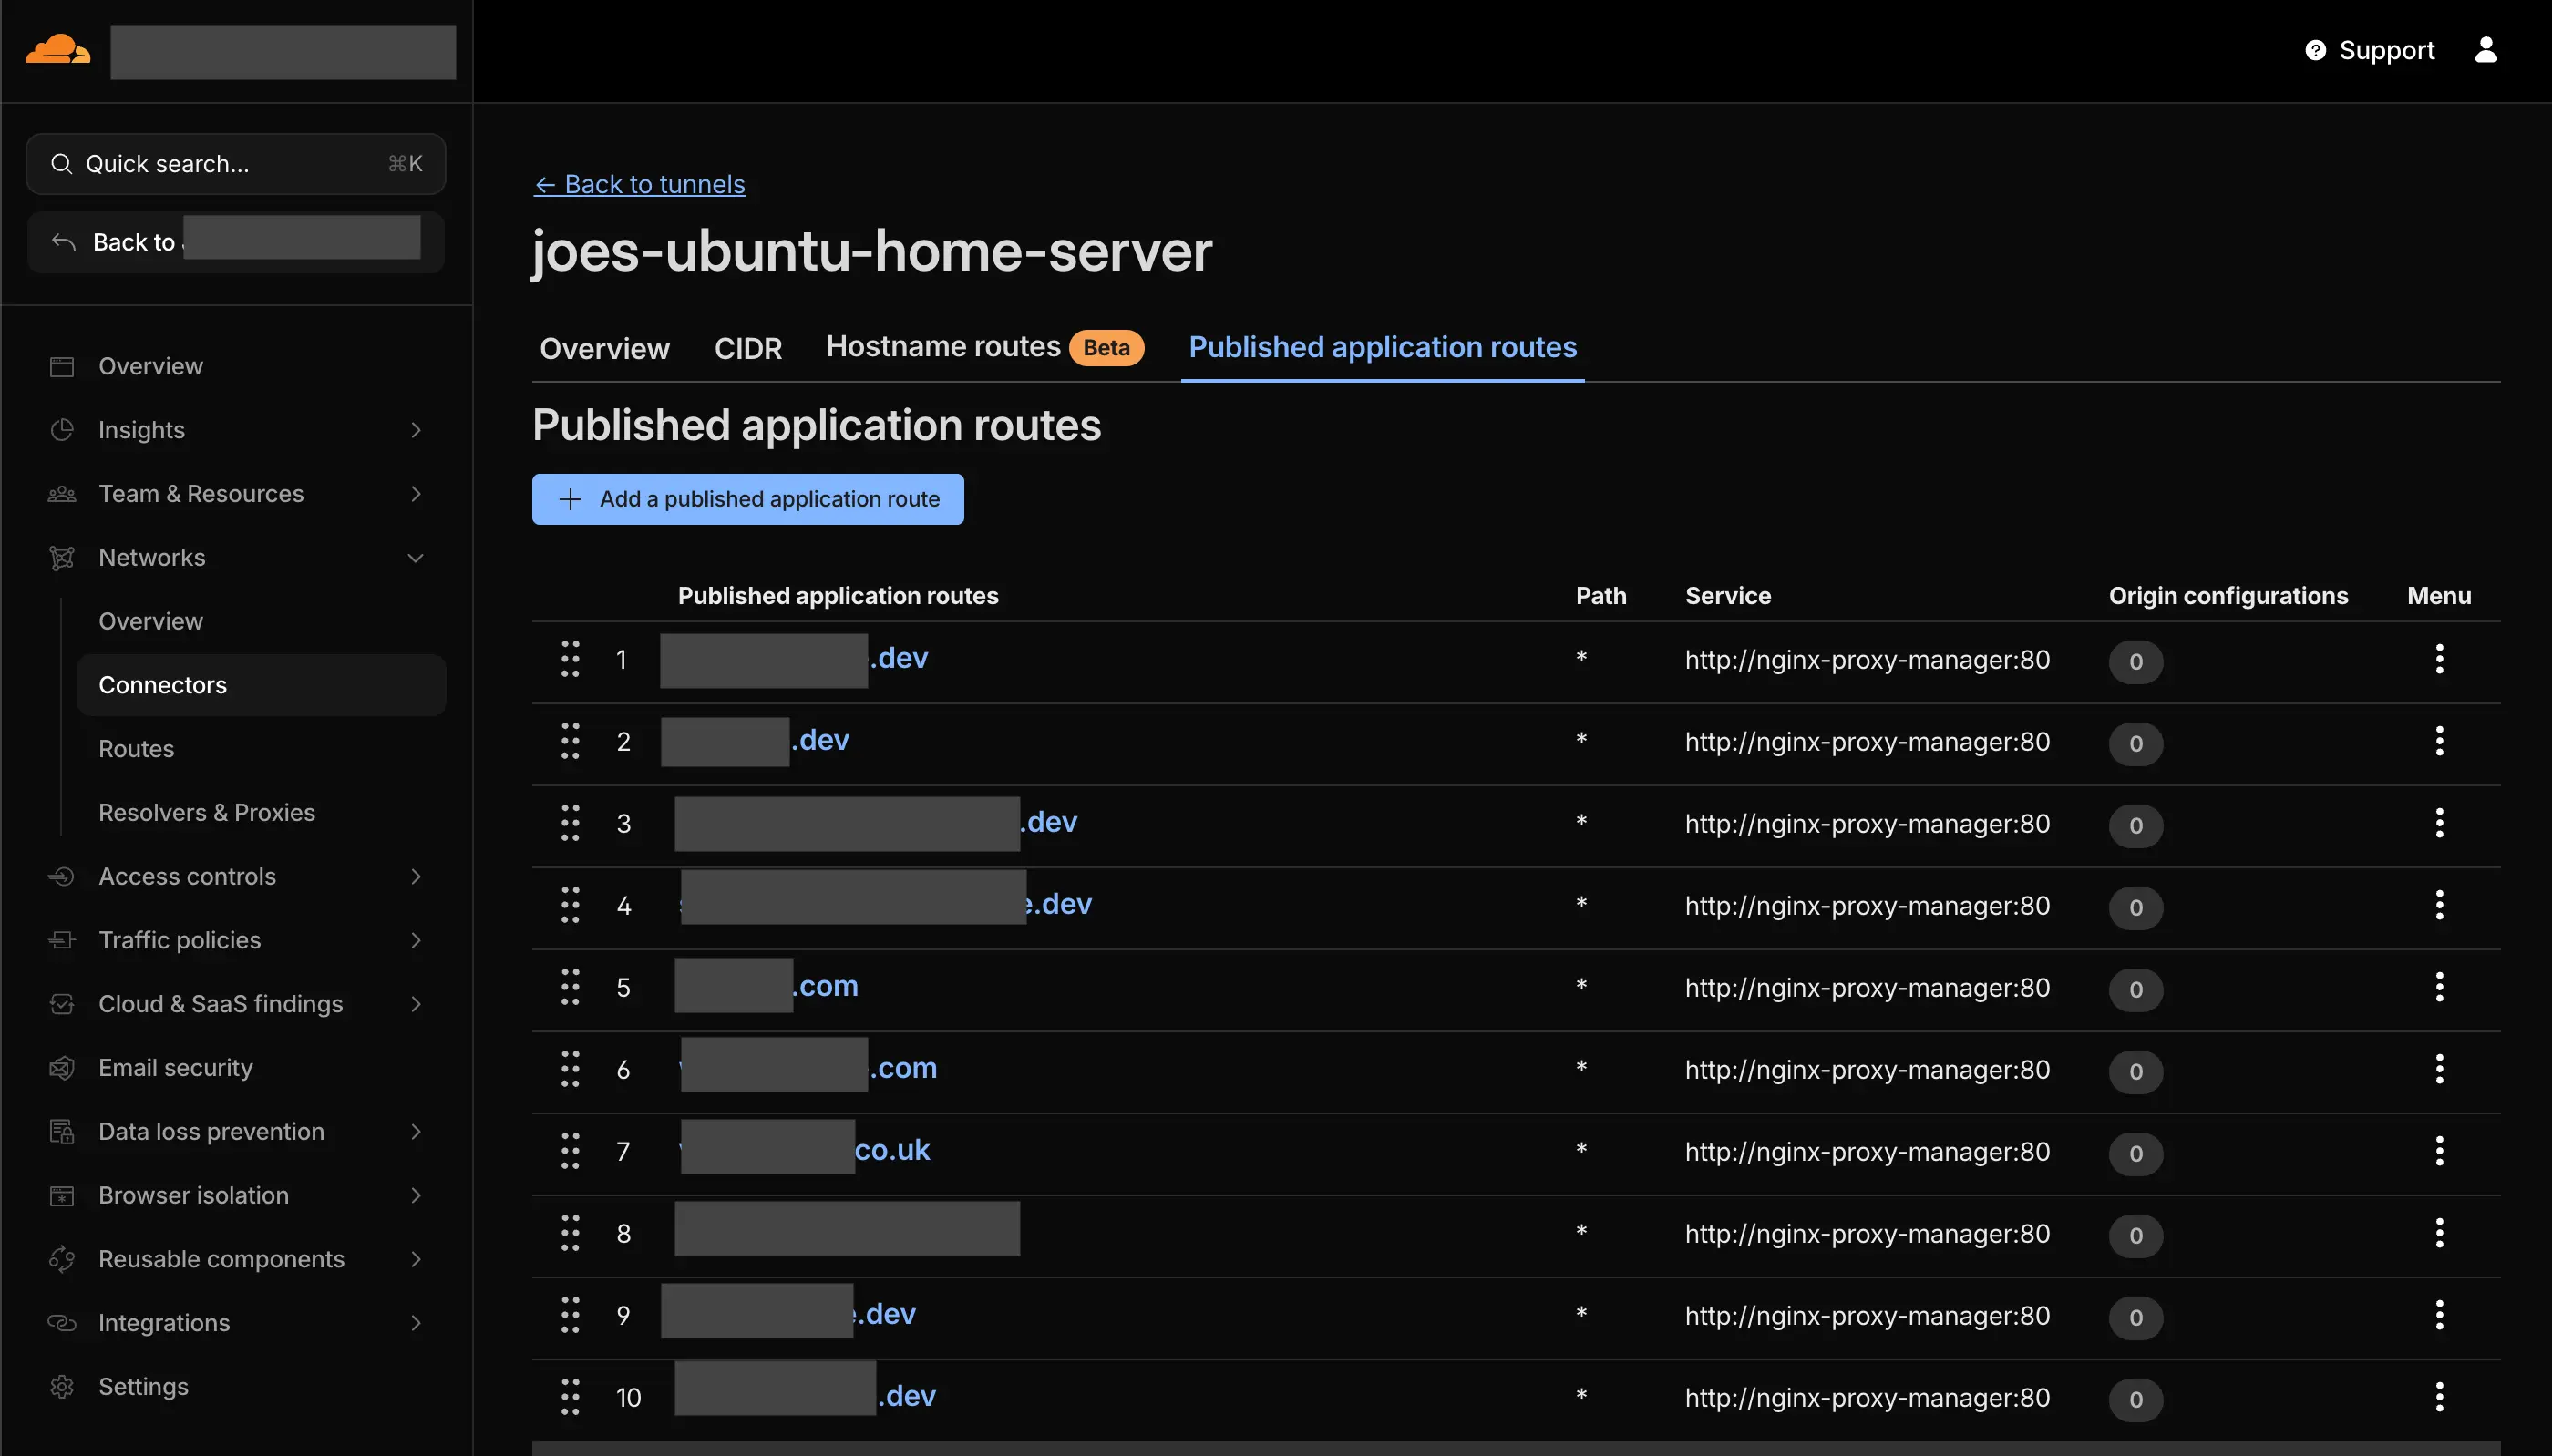
Click on "Published Application Routes" tab, and then the "+ Add a published application route" button and add the following:
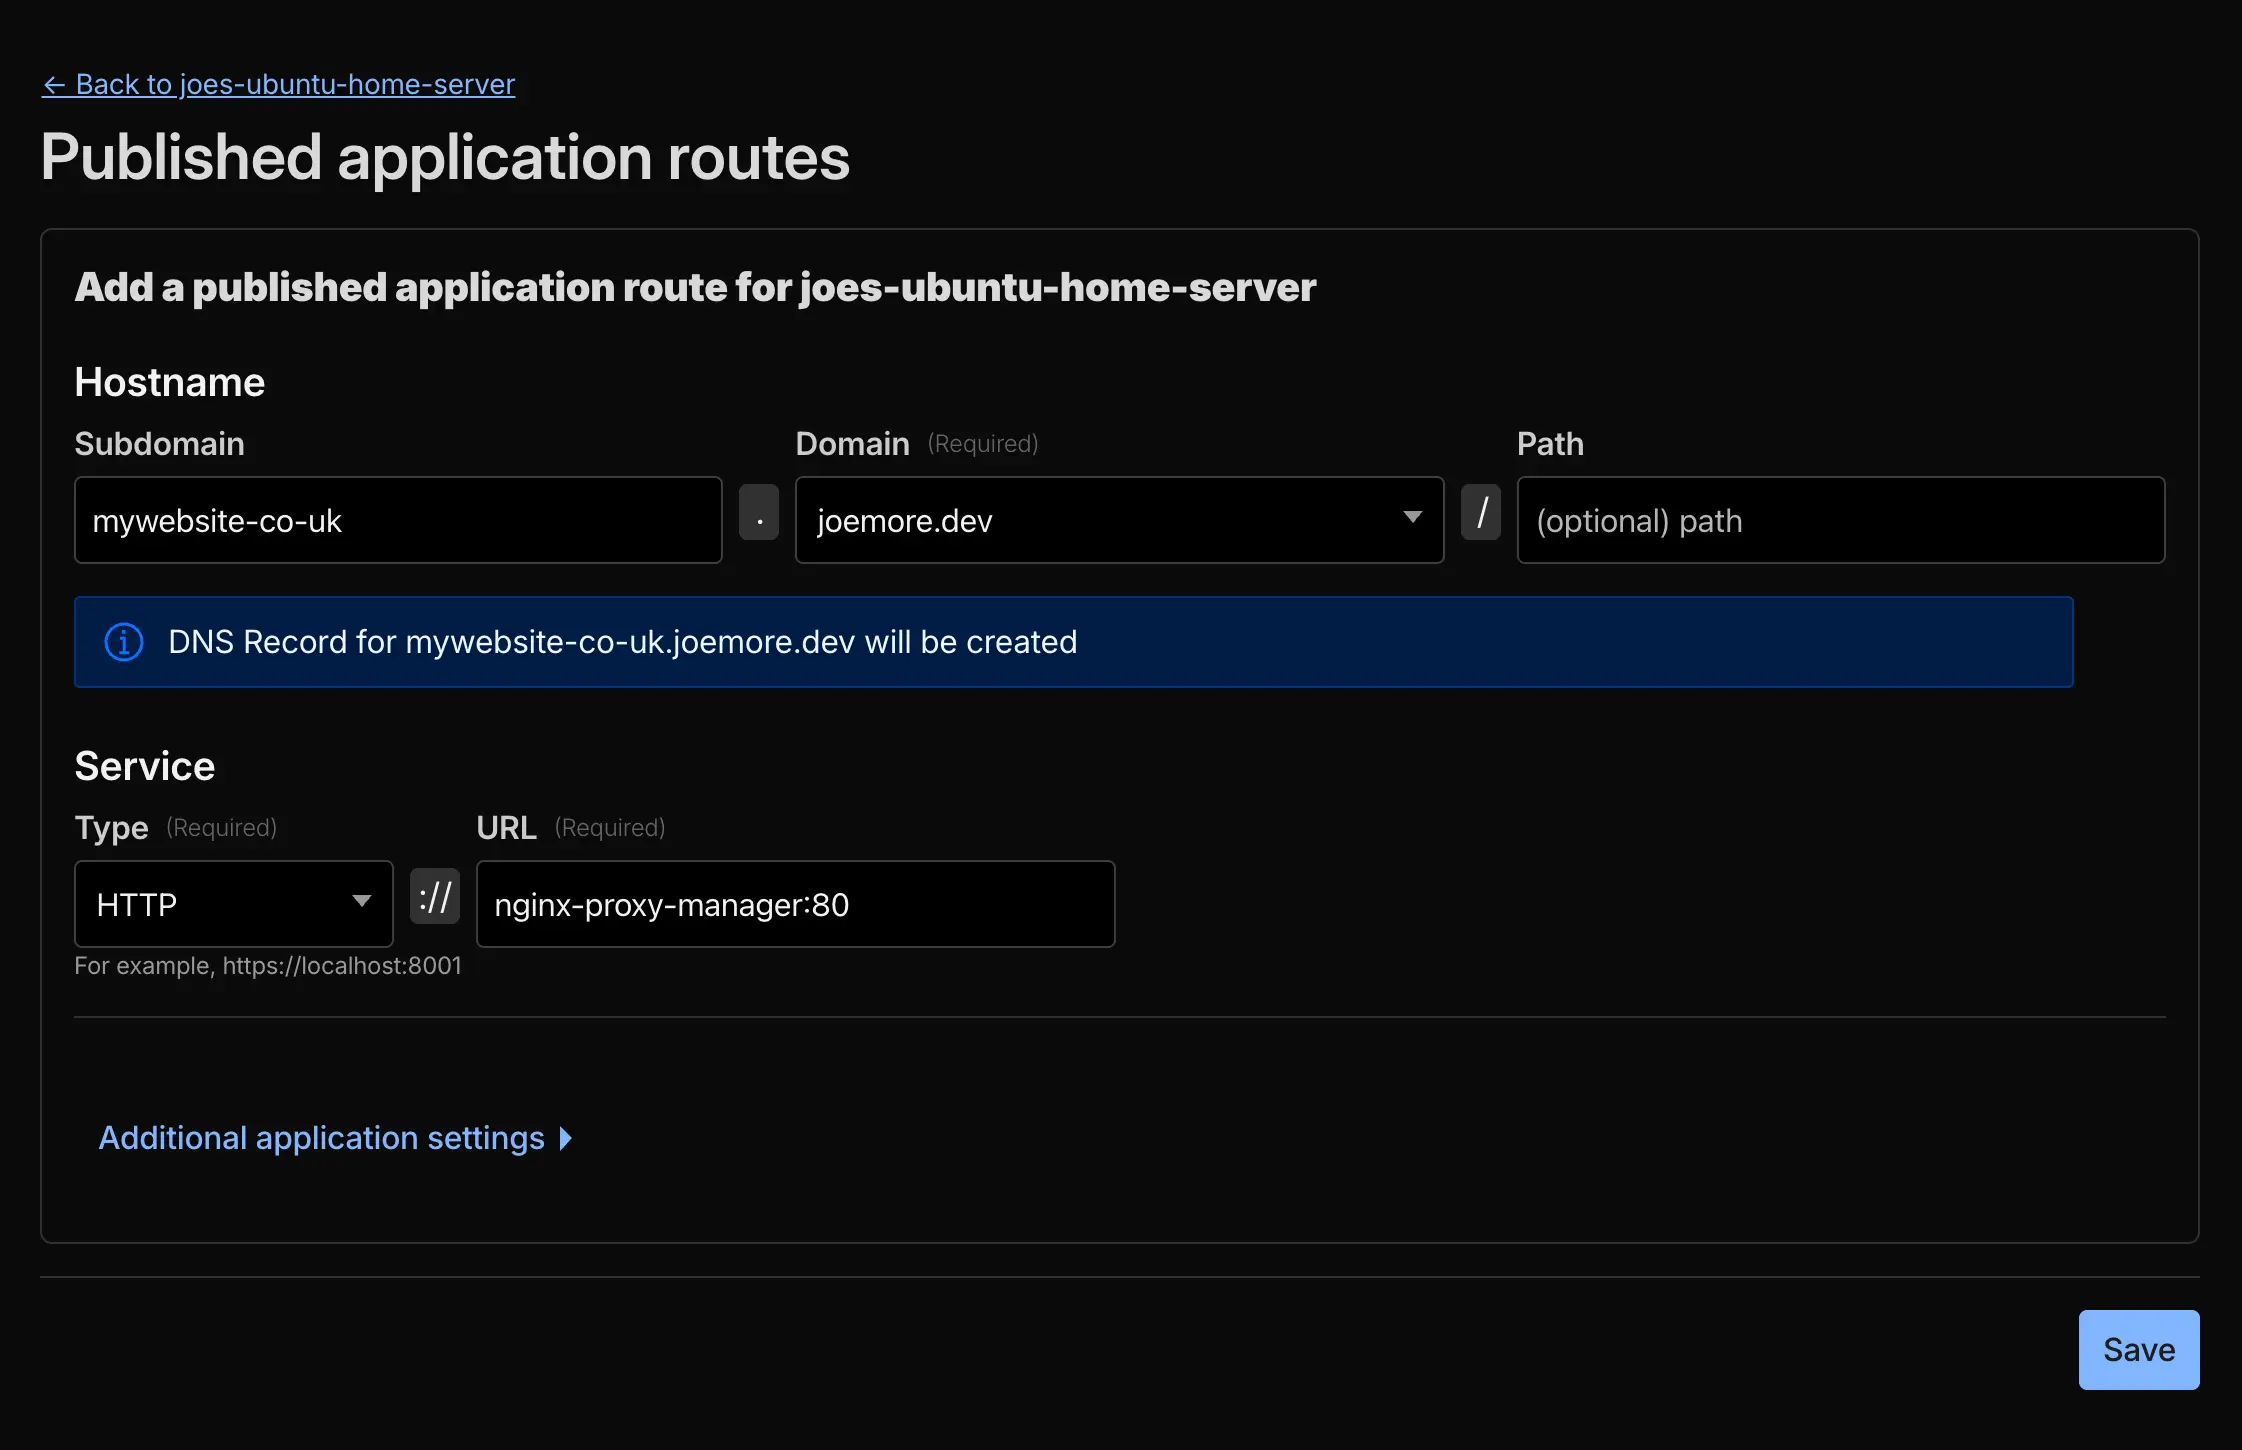
- Subdomain:
www - Hostname:
mywebsite.co.uk - Service Type:
http - Service URL:
nginx-proxy-manager:80 - Then test:
https://www.mywebsite.co.uk
12. Then test your URL
I know it's a lot of steps, but essentially what we are doing is similar to what Vercel or Amplify are doing under the hood.
Open https://www.mywebsite.co.uk and make sure it reaches your new Next.js app.
If your website is up and running then you now have a completely free website running from Joes Local Server!
13. Push a new change to "prod" branch to test the full CI/CD pipeline
When you push to prod, Github Actions should build and push a new Docker image, then your Home Server should pull the new image and restart the container automatically using the WatchTower docker container. WatchTower checks for new images every 60 seconds by default.